Hidden Instagram Tips And Tricks part 7
26. Hide ads you don't find relevant.
Instagram tries to show you ads that are interesting and relevant to you. You might see ads based on people you follow and things you Like on Instagram, or the third-party websites and apps you visit.
If you see sponsored posts you don't find relevant, though, you can let Instagram know and slowly teach its algorithm what you like and don't like to see.
To hide ads on Instagram, tap on the three dots to the right of a post labeled "Sponsored," and choose "Hide This."
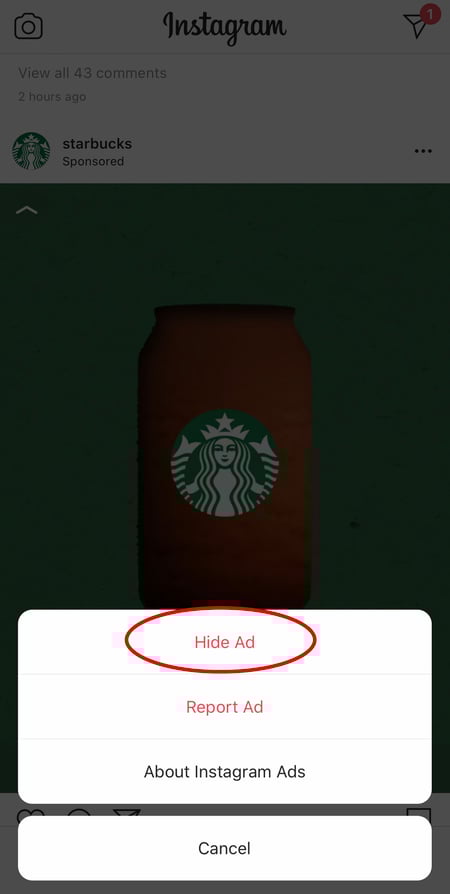
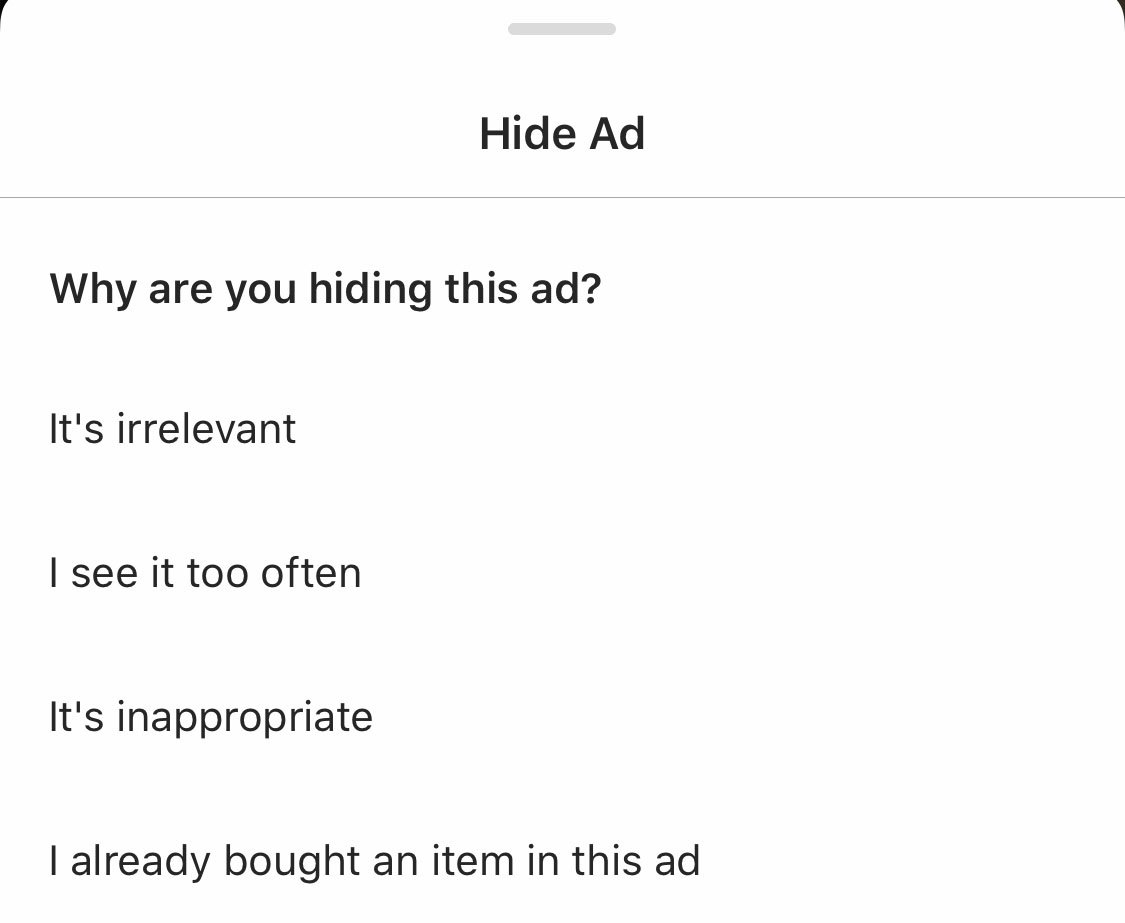
From there, it'll ask you to share why you don't want to see the ad anymore.
You can also opt out of seeing ads based on sites and apps off of Instagram and Facebook from your device's settings. Note that even if you choose to opt out of seeing these types of ads, you'll still see ads based on your Instagram and Facebook activity.
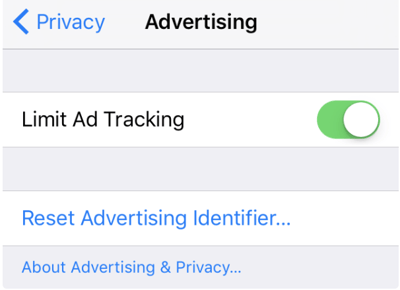
- To limit ad tracking on an iPhone/iPad: Go to "Settings" and choose "Privacy," then "Advertising." From there, choose the option to "Limit Ad Tracking"
- To turn off interest-based ads on Android: Go to "Google Settings," then "Ads." From there, choose the option to "Turn off interest-based ads."

27. Send photos privately to your friends.
Posting photos with all of your followers or with the public isn't the only way to share content on Instagram. You can also share them with individual or multiple users, kind of like a Facebook message or group text message.
You can either send a new photo to friends, or send a photo that you or someone else has already posted.
To send a new photo privately, upload a photo and begin editing it, as you would when editing a new post. When you get to the "Share" page, tap the top where it automatically says "New Post," but when prompted, select "Direct Message." From there, you can pick and choose whom you'd like to send the photo to.
You can access your direct messages at any time by clicking the mailbox icon at the top right of your homepage.
To send an existing photo privately, start by opening the post you want to share — it can be your own or someone else's, as long as the latter has a public account. Next, click the paper-airplane-like icon below the post, then select who you want to receive it when the "Send to" box appears.
User Search Features
28. Search Instagram users without an account.
As much as Instagram would like to see you ultimately create an account for yourself or your business, you can peruse the beautiful brands, people, and dogs that are waiting for you without an account to see if it's worth signing up.
There are two ways to search for people on Instagram without logging in:
Entering a Username at the End of the Instagram URL
The first way to search users without an account is by using an Instagram username you already know, and adding it to the end of "www.instagram.com/."
For example, if you were to start with our Instagram username — which is simply "r_mvzz" — you can enter the following into your browser's address bar: www.instagram.com/R_mvzz This will bring you to our Instagram profile as well as the elusive search bar at the top of the page:
Once you've reached this page, you can use the search bar to the left of the "Sign Up" button to browse users who are already active on the platform.
Googling Them in an Instagram Site Search
A slightly "hackier" way of looking up users without an Instagram account of your own is to simply search their name in a Google site search. This means telling Google to only look up search terms on a website of your choice (in this case, Instagram).
To site search a user, open a Google search and type the following: " site:instagram.com [name of user]."
By keeping all the text prior to the brackets in your search bar, you can shuffle through names of people and businesses and Google will produce results that live
only
on Instagram. Here's what a site search looks like for HubSpot, below. As you can see, Google produces our main profile, our culture-focused HubSpot Life profile, Instagram posts that include the #hubspot hashtag, and our HubSpot Academy Page.
29. Upload and browse video content on IGTV.
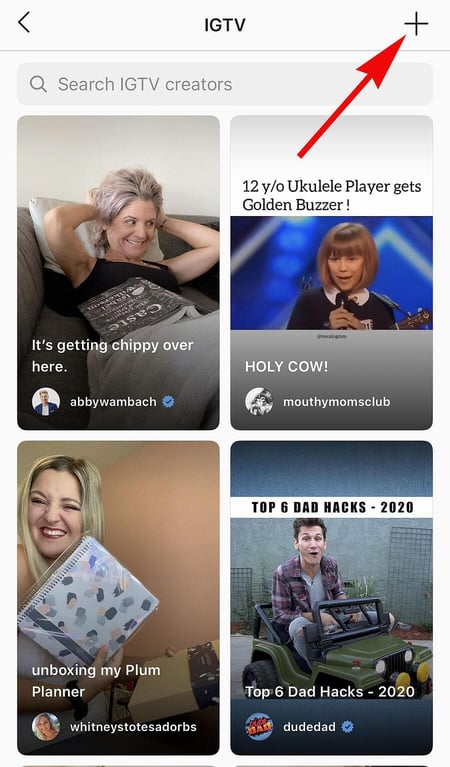
IGTV is one of the biggest new features by Instagram to date. This acronym, as you might assume, stands for "Instagram TV," and it's basically an Explore page just for users' video content. The main benefits of IGTV? You can upload videos more than 60 seconds long, and you can create your own channel with, perhaps, a video series that can be broadcast across other video platforms like YouTube.
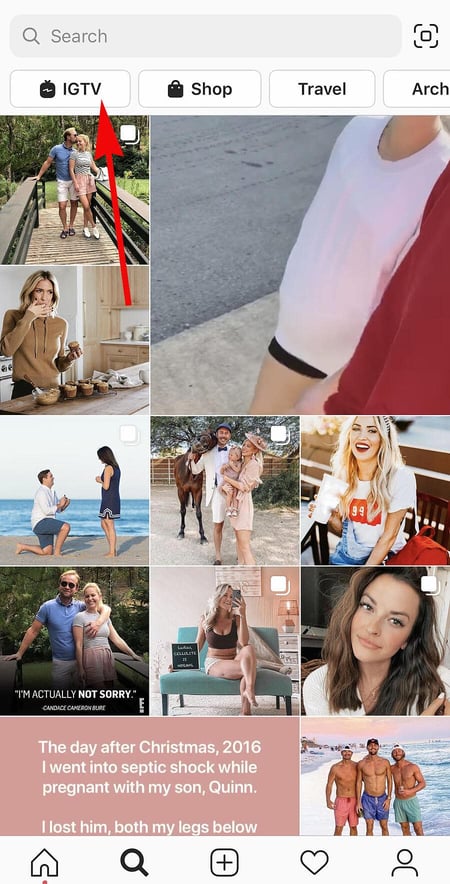
Navigate to IGTV by going to your Explore page and selecting "IGTV" at the top, as shown above. A page will appear featuring topics and videos by some of the most prolific IGTV video creators on the platform today.
As you view more videos, the topics you see on the IGTV homepage will begin to adapt to your interests and serve you more content around those interests. And, naturally, the same goes for your target audience.
Create an IGTV channel by tapping the "+" icon to the top right of your screen, as shown below:
With an IGTV channel created, you can then upload videos directly from your smartphone's camera roll to your channel.
30. Look through pictures without accidentally liking them.
It's pretty easy to learn how to like something on Instagram — so easy, in fact, that people do it accidentally: It's just a quick double tap of the photo once you've entered its full view.
The thing is, it's so easy to do quickly by mistake.
So, here's a quick Instagram cheat for you: To look through someone's photos without "double-tap paranoia," scroll through Instagram feeds with your phone set to airplane mode. Without internet access, you won't be able to Like a photo, even if you accidentally double-tap it.
The pictures won't load in the first place if you start on airplane mode, though. You'll have to go to the feed first to load the posts, then turn on airplane mode, then start scrolling.
When you reach the end of the first rows of posts and want to load more, simply turn airplane mode off, let more load, and then turn it on again. Cumbersome? Maybe a little, but it could be worth the paranoia mitigation.
- To turn on airplane mode on an iPhone/iPad: Swipe up from the bottom of the screen and click the airplane icon. Or, go to "Settings" and then "Wi-Fi," and switch "Airplane Mode" on.
- To turn on airplane mode on an Android device: Swipe down from the top of the screen. Then, swipe from right to left until you see "Settings," and then touch it. Touch "Airplane Mode" to turn it on.
31. Browse posts from certain locations.
One fun thing you can do on Instagram is browse photos and videos from a specific location, or taken near your current location. I like to do that when I'm planning a trip somewhere, or want to check out a new restaurant and scroll through the pictures taken there.
Here's how to do both of these things.
To Browse Posts From at a Specific Location:
You can either search for a specific place, or you can click into a geotag on an existing photo.
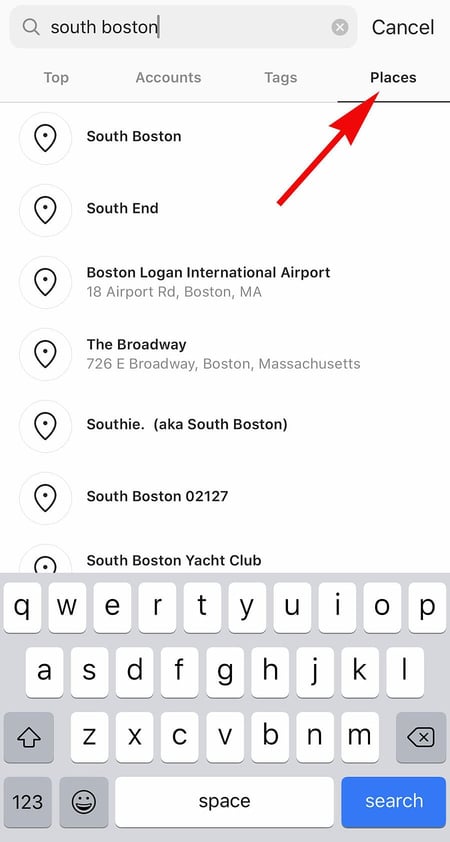
To search for a specific place: Tap the magnifying glass icon at the bottom of your home screen, which will bring you to the general search page. When you click into the search bar at the top, four tabs will appear. Choose "Places," and type in the name of a place. When you press "Search," it'll show you all the top and recent posts that were geotagged with that location.
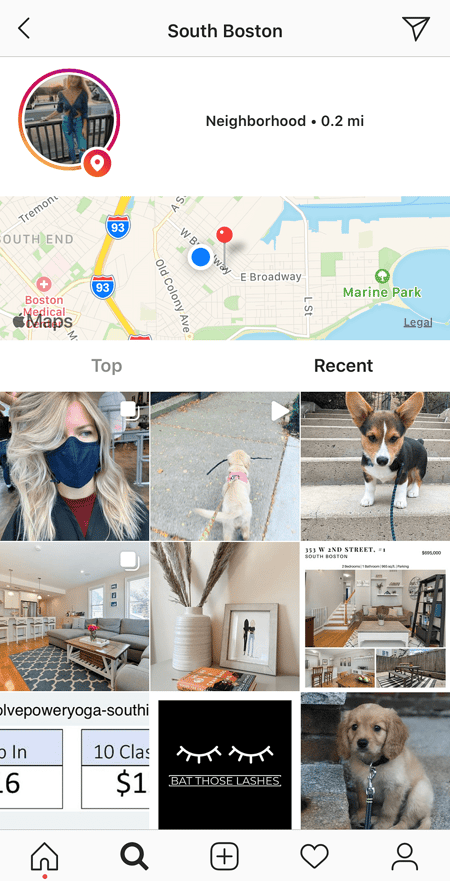 To look at posts with a certain geotag: Go to the photo that's geotagged with that location, and click the geotag. It'll show you all the top and recent posts that were geotagged with that location.


Browse Posts Near Your Current Location:
Follow the same instructions above to get to "Places." Tap the search bar, and select "Near Current Location."
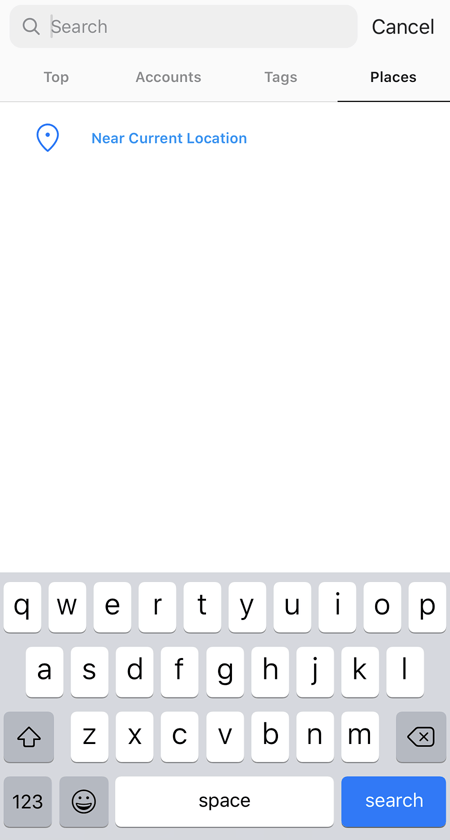
Choose which geotag you'd like to browse from the options that appear. Let's say I chose to browse posts with the Museum of Science geotag. When I click "Museum of Science, Boston" on the menu, I'll see the top and recent posts that were geotagged at that location.
How to Get Verified on Instagram
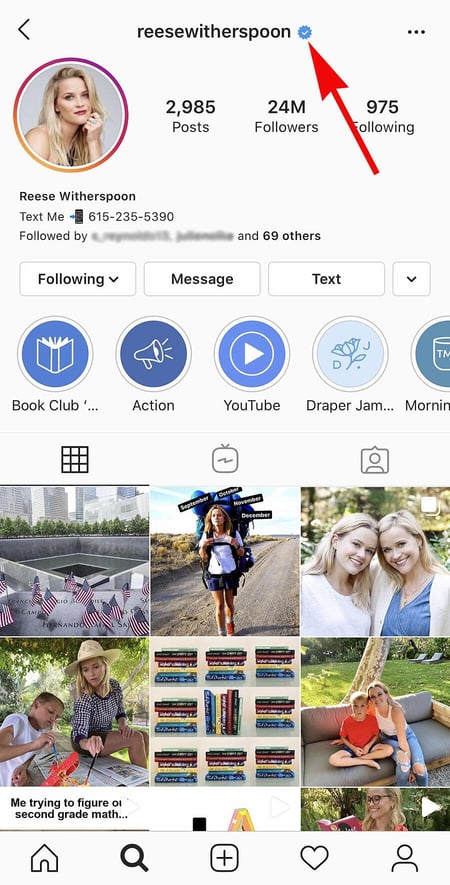
A verified badge (the blue check beside a celebrity or brand account name) tells users that you're, in Instagram's words, "the authentic presence of a notable public figure, celebrity, global brand or entity it represents".
For instance, there are plenty of "Reese Witherspoon" fan pages on Instagram, but there's only one real Reese Witherspoon account, as verified by the blue badge:
To request a verified badge, you must be a public figure, celebrity, or brand and meet certain requirements. If you've determined you fit Instagram's criteria for verification, follow these steps to request a badge:
- Go to your profile (the person icon in bottom left corner).
- Tap the three lines in the top right corner.
- Click "Settings" > "Account" > "Request Verification"
- Fill out the form, including username, Full Name, Known As, Category, and government-issued phoot ID.
- When you've filled out all form fields, click "Send".
It's important to note, you won't necessarily receive a verified badge if you request one. Learn more about what happens after you request a verified badge .
Instagram Features & Hacks
I might be biased, but Instagram is one of the most fun (and visually appealing) social apps around. And now, with these tricks, you can use it to an even fuller extent.
Plus, many of these features can help to enhance your brand's presence on Instagram. Now, you know how to use the app more efficiently, to make sure you're only tagged in photos you want to appear on your profile, and have even more ways to engage with the people by whom you'd like to be discovered.
0 Response to "Hidden Instagram Tips And Tricks part 7"
Post a Comment